 |
|
All content on this site Copyright
©2002-2006 Dave Pinx. All rights reserved.
|
|
|
All content on this site Copyright
©2002-2006 Dave Pinx. All rights reserved.
|
![]()
 |
 |
 |
 |
 |
 |
 |
|
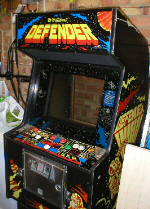
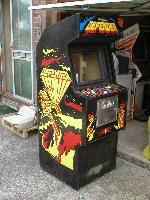
Restoration and where to start ! Deciding where to start isnt always easy, so it pays to have
a plan mapped out in advance. I decided that i wanted to make the game look as complete as possible, before
worrying about it working. Seeing a complete looking cab in the garage every day, is going to give me the
incentive to carry on with it. Its quite easy to start to ignore a half empty cab. Wanting to get going on it as soon
as posible also figured in the plan, so ive started by getting the cheapest things first.
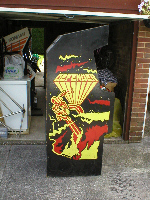
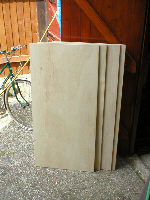
Rather than try and buy a DEFENDER back door ( Hard to get and probably not cheap) im going to make one, as they were only a piece of 12 mm plywood. Looking around on the net i found the Dimensions i needed and just as a cross reference i measured the hole it fits into myself, bingo they match !! So i got me self off down to B&Q the Depot and found a sheet of 8' x 4' hardwood ply 12mm thick was £14.28 and they will cut it for you for free to any size you want, major result..... So i managed to get 2 out the size i wanted (so i have a spare) and still had a couple of large offcuts ! |
 |
|
|
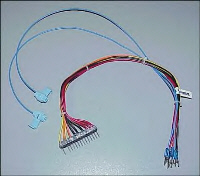
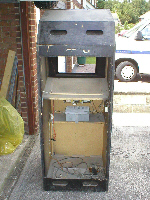
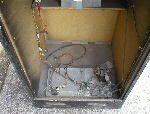
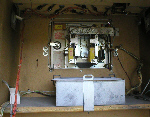
Power Supply (PSU) As i have said in the opening description, reliability is the
name of the game and DEFENDER'S were anything but that, one reason being the power supply.
These are prone to failure and when they do, they can mess up real
nice, as they can spike all the way to the game pcb's and blow those
too ! So there are two options, replace the missing
PSU with an original and completely rebuild it or, use a Jamma
one instead. I am going to get an origional linear one and rebuild
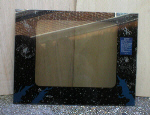
it, If you chose the jamma route, at only £19.99 they are cheap, also extremely reliable and hold good solid +5v and +12v it is also switchable from 240v ac to 110v ac you can buy them from Swallow Amusements. Wiring is not a problem as there is a loom kit available at $30.00 + $6.00 p&p from ArcadeShop Amusements in the U.S. This loom literaly plugs straight into your origional DEFENDER loom and then just connect the other end to the terminals on your PSU. As simple as that ! Monitor Bezel This being a part that is easily scratched or broken, it tends
to be hard to find and gets snapped up really quickly, as i have found
recently. So i have to say a BIG Thankyou to Randy a friend i have gotten to know in the States, who managed to source one for me. This really was
a result, It is in very good condition and after a bit of a wipe over with a duster, came up real
nice. Luckily my cab still had the Bezel attatchment plastic strip. So all
i had to do was slide her in place and screw the strip in on top ! Another piece of the jigsaw in place....
|
|
|
|
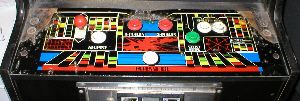
Control Panel Overlay
Not a pretty sight is it ? After 20 odd years of fag burns and destructive teenage fingers the CPO is looking very sad. Luckily the wood underneath is o.k. so what is called for is a new CPO. Now unless you are lucky enough to get hold of a NOS ( New Old Stock ) one and they fetch their money, its easier to buy reproduction. But BEWARE as there are some pretty naff ones out there and you could get ripped off !! If its not reverse silk screen printed, then its no good.
I suggest Arcade Renovations, where i got mine from, at $39.99 plus postage it is very
good value for money and instantly transforms your control panel. It
is colour matched and comes with a 100% money back guarantee. You wont
get nearer to the origional than this..
|
![]()
|
|
Click
Lander Alien for page 2
|
![]()
|
Click
banner for Home.
|