
|
How to Discharge an Arcade Monitor.
|
![]()
|
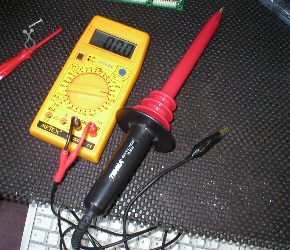
Tools needed.
40KV HV Probe.
|
Difficulty Rating. o1
*********************
10 |
Time it takes. Roughly 15 to 20 minutes, which includes removing the chasis.
|
![]()
|
! All notes here are for reference only, i will not be held responsible for any mistakes / injury's done to you, your wife, mates, etc ! Monitors
are probably the most Dangerous thing in an Aracde Cabinet, as they
can hold voltages of up to 30,000 volts !!!!
|
|
Tools. Before you go diving
in and start pulling out Anode plugs, So if there is 5,000 volts in your CRT (Cathode Ray Tube) it will show as 5 volts DC on your multimeter.
|
 |
![]()
|
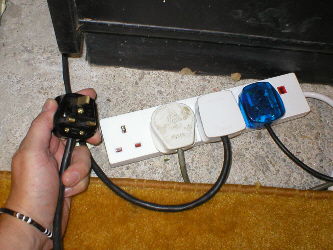
Getting started. Before
you do anything, UNPLUG YOUR CAB ! If in doubt, DO NOT TOUCH its a brilliant motto, use it. |
 |
![]()
|
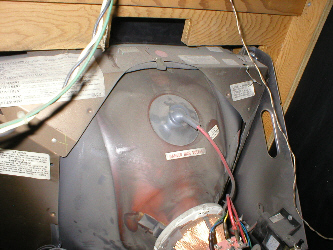
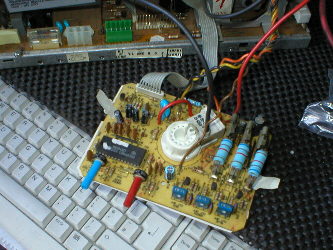
So what exactly do i discharge ? To be able to work on your monitor chasis, you need to remove it and to be able to remove it you need to discharge the CRT. The chasis has a Line Output Transformer (LOPT) on it, which connects to the CRT via a thick red lead and is attatched under a big rubber cup called the Anode cap. This is where the Anode clips into the back of the tube and its here where we discharge the tube. DO NOT grab, touch or fiddle with anything in this area untill the monitor is discharged !
|
 |
![]()
|
|
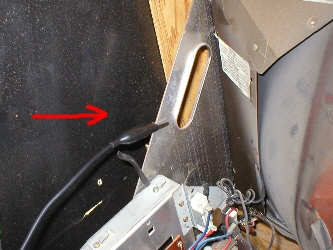
HV Probe meter connections & GND clip. Connect the black lead to the common connector on your multimeter and the red lead to volts connector. Once you have done this select 200 volts DC on the dial in the middle of your multimeter. Now take the black lead with the crocodile clip on it and attatch it to part of the monitor cage, where it will make a good GND connection. |
 |
![]()
|
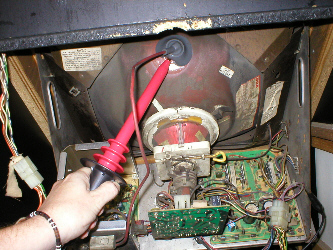
Time to probe. Now pick up the probe with one hand and put the other hand you are not using in your pocket, by doing this, you avoid your body making a circuit, in case your other hand is touching something it should'nt. Now gently push the tip of the probe under the rubber cup untill it reaches the clip in the center, if you glance at your multimeter whilst you are doing this any voltage stored in the tube, will be shown on the read out, but only for a few seconds or so. ! Remember the probe steps down the voltage to the meter by 1,000 > 1 ! So
if its saying 1 on your display, don't
be fooled into thinking its 1 volt DC as
it is actually reading 1,000 volts DC
!! |
 |
![]()
|
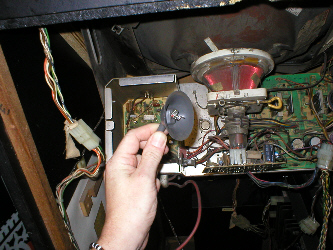
Removing the cap. Under
the rubber cup, is a clip which has a couple of little prongs that face
away from each other and these are what clip it in the hole.
|
 |
![]()
|
|
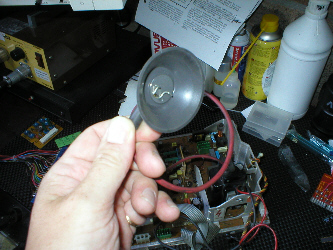
Grounding the cap. To make sure the anode is holding no charge, touch it agianst the monitor cage a couple of times. Pic on right gives a better view of the prongs inside the cup. |
 |
![]()
|
|
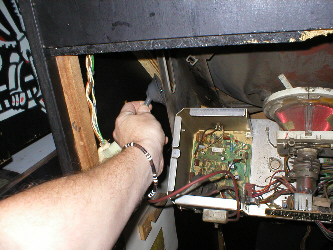
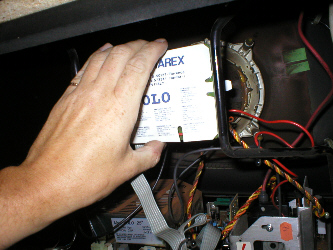
Removing the neck card. As the neck of a tube is easily damaged, it pays to be cautious when removing the neck card, it is also possible to get a shock from the neck pins, so again caution should be used. Grab the card (pcb) at the top and bottom, by the tips of your fingers, very gently wiggle from top to bottom in small increments as you pull, do not rush, take your time and pull gently ! |
 |
![]()
![]()
|
Click
banner for Home
|